따라만 하면 아주 easy 하게 완벽하게! | 꾸버스 애플 47 베이직 바베큐그릴 조립 방법

지금 보고 있는 영상
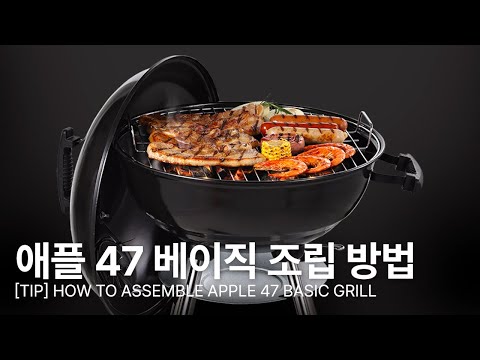
따라만 하면 아주 easy 하게 완벽하게! | 꾸버스 애플 47 베이직 바베큐그릴 조립 방법
조회수 915
영상 설명 · 눌러서 펼치기
⭐전동 드릴 및 강한 힘으로 무리하게 볼트를 조일 경우
법랑 코팅이 벗겨지거나 깨질 수 있습니다.
일반 드라이버 사용 및 적정한 힘으로 조립 권장드립니다!
00:03 ✨ STEP 1 👉 뚜껑 조립
00:49 ✨ STEP 2 👉 본체 조립
01:19 ✨ STEP 3 👉 본체 다리 조립
02:23 ✨ STEP 4 👉 전체 조립
👇👇아래는 상세한 설명입니다! 👇👇
✨ STEP 1 👉 뚜껑 조립
각 부품들을 먼저 확인해주세요
뚜껑 공기 조절구를 A 볼트로 먼저 고정시켜 주세요
뚜껑 안쪽에서 E 나비너트로 조여주세요
뚜껑 손잡이를 A 볼트를 이용해 먼저 고정시켜 주세요
뚜껑 안쪽에서 뚜껑 걸이를 A 볼트에 결합 후 C 와셔를 끼우고 E 나비너트로 조여주세요
남은 한 쪽도 동일하게 A 볼트 먼저 고정한 후 동일하게 조립해주세요
뚜껑 조립 완료!
________________________________________
✨ STEP 2 👉 본체 조립
공기 조절구를 A 볼트로 고정시켜주세요
본체 안쪽에서 E 나비너트로 조여주세요
본체 구멍에 본체 손잡이와 A 볼트를 바깥쪽에서 끼웁니다
안쪽에서 C 와셔를 먼저 끼우고 E 나비너트를 조여 마무리합니다
남은 한 쪽도 A 볼트 바깥쪽에서 먼저 끼운 후 안쪽에서 동일하게 조립해주세요
________________________________________
✨ STEP 3 👉 본체 다리 조립
볼트와 와셔가 그릴 다리에 조립되어 있으니, 조립 시 풀어서 사용해주세요
그릴 다리 부속품을 체결해주세요
★본체 손잡이가 있는 방향에 고정 다리가 조립되어야 합니다
본체 안쪽에서 F 볼트와 F 와셔를 같이 넣어주세요
다리를 결합하시되, 꽉 조이지 않아야 이후 다리 고정대 조립 시 편합니다
같은 방식으로 남은 한 쪽 고정 다리도 조립해주세요
★바퀴 다리는 꺾인 부분이 서로 마주보도록 결합해주세요
바퀴 다리도 본체 안쪽에서 F 볼트와 F 와셔를 넣은 후 결합해주세요
같은 방식으로 남은 한 쪽 바퀴 다리도 조립해주세요
다리 고정대의 꺾인 부분이 아래(지면)를 향하도록 구멍에 맞춰 결합해주세요
다리 고정대에 바퀴 다리를 결합해주세요
바퀴의 볼록한 면이 다리 고정대에 닿도록 결합 후 B 와셔와 D 너트로 조여주세요
반대쪽 바퀴도 동일하게 조립해주세요
________________________________________
✨ STEP 4 👉 전체 조립
본체를 바로 세운 후 다리 볼트 4개를 모두 제대로 조여줍니다
본체 하단에 숯 재받이를 기울여서 넣어주세요
본체 내부에 물받이를 넣고 그 위에 숯 받침대를 올려주세요
마지막으로 석쇠를 올려주세요
________________________________________
🍗 꾸버스 애플 47 베이직 조립 완료! 이제 바베큐를 즐기러 가볼까요? 🍗
✨ STEP 1 👉 Lid Assembly
Please check all parts first.
Secure the lid air vent using the A bolt.
Tighten it from the inside of the lid with the E wing nut.
Attach the lid handle using the A bolt.
From the inside, connect the lid hook to the A bolt, insert the C washer, and tighten with the E wing nut.
Assemble the remaining side in the same way—secure with the A bolt first, then repeat the steps above.
Lid assembly complete!
________________________________________
✨ STEP 2 👉 Body Assembly
Secure the air vent to the body using the A bolt.
Tighten it from the inside with the E wing nut.
Insert the body handle and A bolt from the outside through the body holes.
From the inside, place the C washer first, then tighten with the E wing nut.
Assemble the remaining side the same way—insert the A bolt from the outside, then secure from the inside.
________________________________________
✨ STEP 3 👉 Leg Assembly
Bolts and washers are pre-attached to the grill legs, Please loosen them before assembly.
Attach the leg components.
★ The fixed legs must be installed on the same side as the body handle.
Insert the F bolt and F washer together from the inside of the body.
Attach the leg, but do not fully tighten—this makes installing the leg brace easier later.
Assemble the remaining fixed leg in the same way.
★ Install the wheel legs so the bent sections face each other.
Insert the F bolt and F washer from the inside, then attach the wheel leg.
Assemble the remaining wheel leg the same way.
Attach the leg brace with the bent side facing downward (toward the ground), aligning it with the holes.
Connect the wheel legs to the leg brace.
Make sure the rounded side of the wheel faces the leg brace, then secure with the B washer and D nut.
Assemble the wheel on the opposite side the same way.
________________________________________
✨ STEP 4 👉 Final Assembly
Stand the body upright and fully tighten all four leg bolts.
Tilt and insert the charcoal ash tray into the bottom of the body.
Place the water tray inside the body, then set the charcoal plate on top.
Finally, place the cooking grate on top.
________________________________________
✅ Assembly complete!
Now, let’s go enjoy your barbecue! 🔥🍖
#꾸버스 #바베큐그릴 #조립법
법랑 코팅이 벗겨지거나 깨질 수 있습니다.
일반 드라이버 사용 및 적정한 힘으로 조립 권장드립니다!
00:03 ✨ STEP 1 👉 뚜껑 조립
00:49 ✨ STEP 2 👉 본체 조립
01:19 ✨ STEP 3 👉 본체 다리 조립
02:23 ✨ STEP 4 👉 전체 조립
👇👇아래는 상세한 설명입니다! 👇👇
✨ STEP 1 👉 뚜껑 조립
각 부품들을 먼저 확인해주세요
뚜껑 공기 조절구를 A 볼트로 먼저 고정시켜 주세요
뚜껑 안쪽에서 E 나비너트로 조여주세요
뚜껑 손잡이를 A 볼트를 이용해 먼저 고정시켜 주세요
뚜껑 안쪽에서 뚜껑 걸이를 A 볼트에 결합 후 C 와셔를 끼우고 E 나비너트로 조여주세요
남은 한 쪽도 동일하게 A 볼트 먼저 고정한 후 동일하게 조립해주세요
뚜껑 조립 완료!
________________________________________
✨ STEP 2 👉 본체 조립
공기 조절구를 A 볼트로 고정시켜주세요
본체 안쪽에서 E 나비너트로 조여주세요
본체 구멍에 본체 손잡이와 A 볼트를 바깥쪽에서 끼웁니다
안쪽에서 C 와셔를 먼저 끼우고 E 나비너트를 조여 마무리합니다
남은 한 쪽도 A 볼트 바깥쪽에서 먼저 끼운 후 안쪽에서 동일하게 조립해주세요
________________________________________
✨ STEP 3 👉 본체 다리 조립
볼트와 와셔가 그릴 다리에 조립되어 있으니, 조립 시 풀어서 사용해주세요
그릴 다리 부속품을 체결해주세요
★본체 손잡이가 있는 방향에 고정 다리가 조립되어야 합니다
본체 안쪽에서 F 볼트와 F 와셔를 같이 넣어주세요
다리를 결합하시되, 꽉 조이지 않아야 이후 다리 고정대 조립 시 편합니다
같은 방식으로 남은 한 쪽 고정 다리도 조립해주세요
★바퀴 다리는 꺾인 부분이 서로 마주보도록 결합해주세요
바퀴 다리도 본체 안쪽에서 F 볼트와 F 와셔를 넣은 후 결합해주세요
같은 방식으로 남은 한 쪽 바퀴 다리도 조립해주세요
다리 고정대의 꺾인 부분이 아래(지면)를 향하도록 구멍에 맞춰 결합해주세요
다리 고정대에 바퀴 다리를 결합해주세요
바퀴의 볼록한 면이 다리 고정대에 닿도록 결합 후 B 와셔와 D 너트로 조여주세요
반대쪽 바퀴도 동일하게 조립해주세요
________________________________________
✨ STEP 4 👉 전체 조립
본체를 바로 세운 후 다리 볼트 4개를 모두 제대로 조여줍니다
본체 하단에 숯 재받이를 기울여서 넣어주세요
본체 내부에 물받이를 넣고 그 위에 숯 받침대를 올려주세요
마지막으로 석쇠를 올려주세요
________________________________________
🍗 꾸버스 애플 47 베이직 조립 완료! 이제 바베큐를 즐기러 가볼까요? 🍗
✨ STEP 1 👉 Lid Assembly
Please check all parts first.
Secure the lid air vent using the A bolt.
Tighten it from the inside of the lid with the E wing nut.
Attach the lid handle using the A bolt.
From the inside, connect the lid hook to the A bolt, insert the C washer, and tighten with the E wing nut.
Assemble the remaining side in the same way—secure with the A bolt first, then repeat the steps above.
Lid assembly complete!
________________________________________
✨ STEP 2 👉 Body Assembly
Secure the air vent to the body using the A bolt.
Tighten it from the inside with the E wing nut.
Insert the body handle and A bolt from the outside through the body holes.
From the inside, place the C washer first, then tighten with the E wing nut.
Assemble the remaining side the same way—insert the A bolt from the outside, then secure from the inside.
________________________________________
✨ STEP 3 👉 Leg Assembly
Bolts and washers are pre-attached to the grill legs, Please loosen them before assembly.
Attach the leg components.
★ The fixed legs must be installed on the same side as the body handle.
Insert the F bolt and F washer together from the inside of the body.
Attach the leg, but do not fully tighten—this makes installing the leg brace easier later.
Assemble the remaining fixed leg in the same way.
★ Install the wheel legs so the bent sections face each other.
Insert the F bolt and F washer from the inside, then attach the wheel leg.
Assemble the remaining wheel leg the same way.
Attach the leg brace with the bent side facing downward (toward the ground), aligning it with the holes.
Connect the wheel legs to the leg brace.
Make sure the rounded side of the wheel faces the leg brace, then secure with the B washer and D nut.
Assemble the wheel on the opposite side the same way.
________________________________________
✨ STEP 4 👉 Final Assembly
Stand the body upright and fully tighten all four leg bolts.
Tilt and insert the charcoal ash tray into the bottom of the body.
Place the water tray inside the body, then set the charcoal plate on top.
Finally, place the cooking grate on top.
________________________________________
✅ Assembly complete!
Now, let’s go enjoy your barbecue! 🔥🍖
#꾸버스 #바베큐그릴 #조립법
꾸버스 GGUBUS 다른 영상

🔥 🔥 꾸버스 NEW 스모킹하우스 출시 D-2 🔥 🔥
조회수 335

The Original is Back #꾸버스 #훈제박스 #바베큐그릴 #원조훈제박스
조회수 187

[체험단모집]꾸버스 싸이클론 화로대🔥
조회수 595

요즘 이게 난리 났다던데? 난리난 이유 파헤쳐보기! #캠핑 #화로대 #shorts
조회수 1,964

"이거 하나면 된다" 진짜일까요? 이건 좀 다릅니다! #캠핑 #화로대 #shorts
조회수 2,135
본격 캠핑 시동 걸려면? 봄 캠핑 준비 여기서 시작! #캠핑 #박람회 #shorts
조회수 1,670

캠핑 화로대 사용 전! 고민해본 적 있다면? 주목!! #캠핑 #꿀팁 #shorts
조회수 2,014

처음부터 끝까지 알려드립니다! | 꾸버스 애플 57 베이직 바베큐그릴 조립 방법
조회수 718