[춘천닭갈비 한상 3/3] 깍두기에 차조밥을? 아삭하고 시원하게! 배리어프리 | Crunchy Kkakdugi, Barrier-Free Design

지금 보고 있는 영상

[춘천닭갈비 한상 3/3] 깍두기에 차조밥을? 아삭하고 시원하게! 배리어프리 | Crunchy Kkakdugi, Barrier-Free Design
조회수 1,028
영상 설명 · 눌러서 펼치기
깍두기에 차조밥을 넣는다고요?
아삭한 식감에 감칠맛까지 더해집니다!
1. 재료 (Ingredients – Serves 2)
① 주재료
• 무 1kg
• 굵은소금 1½T
• 양파 ⅓개
• 쪽파 3~4줄기
② 양념장
• 다진 마늘 1T
• 다진 생강 1t
• 차조밥 2T (밥 짓듯이 지은 것)
• 고춧가루 ⅓C
• 액젓 1T
• 새우젓 2t
• 매실청 1T
③ 차조밥 짓기
• 차조 ½C
• 물 1C
※ 차조밥은 위 분량으로 지은 뒤 2T만 사용하고, 남은 차조밥은 냉동 보관한 후 다음 깍두기를 담글 때 사용합니다.
2. 재료준비 (Preparation)
① 차조밥 짓기
차조 ½C를 깨끗이 씻어 30분간 불린 뒤, 물기를 뺍니다.
냄비에 불린 차조와 물 1C를 넣고 끓입니다.
끓기 시작하면 약불로 줄여 10분간 더 끓인 뒤, 불을 끄고 5분간 뜸을 들입니다.
② 무 손질하기
무는 껍질을 정리하고 약 1.5cm 크기로 깍둑썰기합니다.
③ 무 절이기
깍둑썰기한 무 1kg에 굵은소금 1½T를 골고루 뿌리고 중간에 1~2번 뒤집어가며 약 1시간 절입니다.
④ 채소 손질하기
무가 절여지는 동안 양파 ⅓개는 가늘게 채썰고, 쪽파 3~4줄기는 4cm 길이로 자릅니다.
⑤ 마늘·생강 다지기
마늘과 생강은 곱게 다집니다.
3. 공정 (Construction)
① 절인 무 물기 빼기
절인 무를 소쿠리에 담아 물기를 충분히 뺍니다.
② 양념장 만들기
다진 마늘 1T, 다진 생강 1t, 차조밥 2T, 고춧가루 ⅓C, 액젓 1T, 새우젓 2t, 매실청 1T를 넣고 골고루 섞습니다. 차조밥은 갈지 않고 그대로 넣습니다.
③ 무와 양념 버무리기
물기를 뺀 무에 양념장을 넣고 골고루 버무려 양념이 무에 고르게 배도록 합니다.
④ 양파·쪽파 넣기
채 썬 양파와 4cm 길이로 자른 쪽파를 넣고 가볍게 버무립니다.
4. 준공 (Completion)
① 깍두기 담기
완성된 깍두기는 김치 용기에 담고 가볍게 눌러줍니다.
② 숙성 및 보관
실온에서 발효 상태를 확인하며 숙성한 뒤 냉장 보관합니다.
Kkakdugi with Millet Rice (Korean Radish Kimchi)
1. Ingredients – Serves 2
① Main Ingredients
• Korean radish: 1 kg
• Coarse salt: 1½ Tbsp
• Onion: ⅓
• Scallions: 3–4 stalks
② Seasoning
• Minced garlic: 1 Tbsp
• Minced ginger: 1 tsp
• Cooked millet: 2 Tbsp
• Korean red pepper flakes (gochugaru): ⅓ cup
• Fish sauce: 1 Tbsp
• Salted fermented shrimp (saeujeot): 2 tsp
• Korean plum syrup (maesil-cheong): 1 Tbsp
③ Cooking the Millet
• Millet: ½ cup
• Water: 1 cup
Note: Use only 2 Tbsp of the cooked millet for this recipe. Freeze the remaining millet for your next batch of kkakdugi.
2. Preparation
① Cook the Millet
Rinse ½ cup of millet thoroughly and soak it in water for 30 minutes. Drain well.
Place the soaked millet and 1 cup of water in a small pot and bring to a boil.
Once boiling, reduce the heat to low and simmer for 10 minutes. Turn off the heat, cover, and let it rest for 5 minutes.
② Prepare the Radish
Trim and peel the radish as needed, then cut it into approximately 1.5 cm cubes.
③ Salt the Radish
Sprinkle 1½ Tbsp of coarse salt evenly over 1 kg of cubed radish.
Let it sit for about 1 hour, turning the radish once or twice to ensure even salting.
④ Prepare the Vegetables
While the radish is salting, thinly slice ⅓ of an onion and cut 3–4 scallions into 4 cm lengths.
⑤ Mince the Garlic and Ginger
Finely mince the garlic and ginger.
3. Construction
① Drain the Salted Radish
Transfer the salted radish to a colander and drain thoroughly.
② Make the Seasoning Mixture
Combine 1 Tbsp minced garlic, 1 tsp minced ginger, 2 Tbsp cooked millet, ⅓ cup gochugaru, 1 Tbsp fish sauce, 2 tsp salted fermented shrimp, and 1 Tbsp Korean plum syrup.
Mix thoroughly until evenly combined.
Add the cooked millet as it is, without blending or grinding.
③ Coat the Radish with Seasoning
Add the seasoning mixture to the drained radish.
Toss thoroughly until every piece is evenly coated, allowing the seasoning to absorb into the radish.
④ Add the Onion and Scallions
Add the thinly sliced onion and 4 cm scallion pieces.
Gently toss until evenly combined.
4. Completion
① Pack the Kkakdugi
Transfer the finished kkakdugi to a kimchi container and press it down gently.
② Fermentation and Storage
Let the kkakdugi ferment at room temperature, checking its fermentation progress, then refrigerate.
아삭한 식감에 감칠맛까지 더해집니다!
1. 재료 (Ingredients – Serves 2)
① 주재료
• 무 1kg
• 굵은소금 1½T
• 양파 ⅓개
• 쪽파 3~4줄기
② 양념장
• 다진 마늘 1T
• 다진 생강 1t
• 차조밥 2T (밥 짓듯이 지은 것)
• 고춧가루 ⅓C
• 액젓 1T
• 새우젓 2t
• 매실청 1T
③ 차조밥 짓기
• 차조 ½C
• 물 1C
※ 차조밥은 위 분량으로 지은 뒤 2T만 사용하고, 남은 차조밥은 냉동 보관한 후 다음 깍두기를 담글 때 사용합니다.
2. 재료준비 (Preparation)
① 차조밥 짓기
차조 ½C를 깨끗이 씻어 30분간 불린 뒤, 물기를 뺍니다.
냄비에 불린 차조와 물 1C를 넣고 끓입니다.
끓기 시작하면 약불로 줄여 10분간 더 끓인 뒤, 불을 끄고 5분간 뜸을 들입니다.
② 무 손질하기
무는 껍질을 정리하고 약 1.5cm 크기로 깍둑썰기합니다.
③ 무 절이기
깍둑썰기한 무 1kg에 굵은소금 1½T를 골고루 뿌리고 중간에 1~2번 뒤집어가며 약 1시간 절입니다.
④ 채소 손질하기
무가 절여지는 동안 양파 ⅓개는 가늘게 채썰고, 쪽파 3~4줄기는 4cm 길이로 자릅니다.
⑤ 마늘·생강 다지기
마늘과 생강은 곱게 다집니다.
3. 공정 (Construction)
① 절인 무 물기 빼기
절인 무를 소쿠리에 담아 물기를 충분히 뺍니다.
② 양념장 만들기
다진 마늘 1T, 다진 생강 1t, 차조밥 2T, 고춧가루 ⅓C, 액젓 1T, 새우젓 2t, 매실청 1T를 넣고 골고루 섞습니다. 차조밥은 갈지 않고 그대로 넣습니다.
③ 무와 양념 버무리기
물기를 뺀 무에 양념장을 넣고 골고루 버무려 양념이 무에 고르게 배도록 합니다.
④ 양파·쪽파 넣기
채 썬 양파와 4cm 길이로 자른 쪽파를 넣고 가볍게 버무립니다.
4. 준공 (Completion)
① 깍두기 담기
완성된 깍두기는 김치 용기에 담고 가볍게 눌러줍니다.
② 숙성 및 보관
실온에서 발효 상태를 확인하며 숙성한 뒤 냉장 보관합니다.
Kkakdugi with Millet Rice (Korean Radish Kimchi)
1. Ingredients – Serves 2
① Main Ingredients
• Korean radish: 1 kg
• Coarse salt: 1½ Tbsp
• Onion: ⅓
• Scallions: 3–4 stalks
② Seasoning
• Minced garlic: 1 Tbsp
• Minced ginger: 1 tsp
• Cooked millet: 2 Tbsp
• Korean red pepper flakes (gochugaru): ⅓ cup
• Fish sauce: 1 Tbsp
• Salted fermented shrimp (saeujeot): 2 tsp
• Korean plum syrup (maesil-cheong): 1 Tbsp
③ Cooking the Millet
• Millet: ½ cup
• Water: 1 cup
Note: Use only 2 Tbsp of the cooked millet for this recipe. Freeze the remaining millet for your next batch of kkakdugi.
2. Preparation
① Cook the Millet
Rinse ½ cup of millet thoroughly and soak it in water for 30 minutes. Drain well.
Place the soaked millet and 1 cup of water in a small pot and bring to a boil.
Once boiling, reduce the heat to low and simmer for 10 minutes. Turn off the heat, cover, and let it rest for 5 minutes.
② Prepare the Radish
Trim and peel the radish as needed, then cut it into approximately 1.5 cm cubes.
③ Salt the Radish
Sprinkle 1½ Tbsp of coarse salt evenly over 1 kg of cubed radish.
Let it sit for about 1 hour, turning the radish once or twice to ensure even salting.
④ Prepare the Vegetables
While the radish is salting, thinly slice ⅓ of an onion and cut 3–4 scallions into 4 cm lengths.
⑤ Mince the Garlic and Ginger
Finely mince the garlic and ginger.
3. Construction
① Drain the Salted Radish
Transfer the salted radish to a colander and drain thoroughly.
② Make the Seasoning Mixture
Combine 1 Tbsp minced garlic, 1 tsp minced ginger, 2 Tbsp cooked millet, ⅓ cup gochugaru, 1 Tbsp fish sauce, 2 tsp salted fermented shrimp, and 1 Tbsp Korean plum syrup.
Mix thoroughly until evenly combined.
Add the cooked millet as it is, without blending or grinding.
③ Coat the Radish with Seasoning
Add the seasoning mixture to the drained radish.
Toss thoroughly until every piece is evenly coated, allowing the seasoning to absorb into the radish.
④ Add the Onion and Scallions
Add the thinly sliced onion and 4 cm scallion pieces.
Gently toss until evenly combined.
4. Completion
① Pack the Kkakdugi
Transfer the finished kkakdugi to a kimchi container and press it down gently.
② Fermentation and Storage
Let the kkakdugi ferment at room temperature, checking its fermentation progress, then refrigerate.
요리하는 아키, 아키쿡 다른 영상

깍두기, 차조밥으로 깊은 맛! 배리어프리 | Kkakdugi, Barrier-Free Design
조회수 64

깍두기, 차조밥으로 깊은 맛! 배리어프리 | Kkakdugi, Barrier-Free Design
조회수 28

[춘천닭갈비 한상 2/3] 오징어실채볶음, 뭉치지 않고 촉촉하게! 인클루시브 디자인 | Stir-Fried Dried Shredded Squid, Inclusive Design
조회수 1,104

[춘천닭갈비 한상 1/3] 집에서 즐기는 춘천닭갈비의 맛! 유니버설디자인 | Chuncheon Dakgalbi, Universal Design
조회수 1,188

매콤한 춘천닭갈비 한 판, 유니버설디자인 | Spicy Chuncheon Dakgalbi, Universal Design
조회수 329

얼큰한 국물이 당기는 날|동태찌개 · 감자부추전 · 풋고추된장무침 | Pollock Stew · Potato Chive Jeon · Chili Doenjan
조회수 1,104
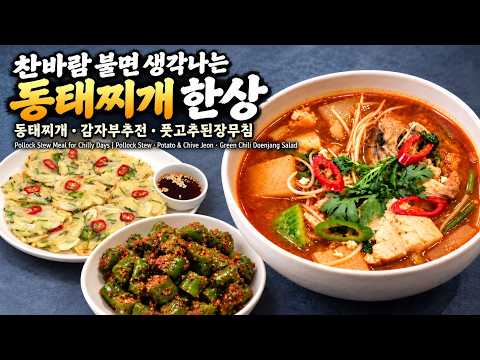
찬바람 불면 생각나는 동태찌개 한상 | 동태찌개 · 감자부추전 · 풋고추된장무침 | Pollock Stew · Potato Chive Jeon · Chili Doenjang
조회수 359

매콤하게 입맛 살리는 마파두부 한상|마파두부 · 새우케첩볶음 · 공심채볶음 | Mapo Tofu · Ketchup Shrimp · Stir-Fried Morning Glory
조회수 1,144